Tampilkan postingan dengan label Canning. Tampilkan semua postingan

Sabtu, 01 Oktober 2011

So much of our future lies in preserving our past.


I normally can my tomatoes using the water bath method.  I decided to try pressure canning because . .. well, just because.


You will need about 20 lbs of tomatoes make 7 quarts . . . 7large tomatoes will fill one quart jar . . . and lemon juice - fresh or bottled(about 1/2 cup)


Make sure you sanitize your jars and lids to prevent moldand fungus contamination which will obviously ruin all your hard work.  Imagine the disappointment when you go for ajar of tomatoes to make a fresh pot of pasta sauce and it’s all yucky. 

The dishwasher is fine for the jars; especially if it has a"sanitize" cycle or submerge the jars in a large pot (the canneritself) of water and bring it to a boil. Put the lids into the small pot ofboiling water for at least several minutes. 
 
 Fill the canner about1/2 full of water and start it heating (with the lid loosely on).

Blanch the tomatoes by placing them, a few at a time, in alarge pot of boiling water for no more than 1 minute (30 - 45 seconds isusually enough) and then immerse them into a waiting bowl of ice water.  This makes the skins slide right off of thetomatoes!  Then cut the tomatoes in quartersand remove the tough part around the stem and any bruised or soft parts.

Fill the jars with the cut tomatoes to within ¼-inch of thetop with the tomatoes.  Using a flatplastic or wood utensil (like a plastic spoon, up side down) free trapped airbubbles by gently sliding it up and down around the inside edge.

Add 2 Tablespoons of lemon juice and enough liquid to fill to1/2 inch of the top of the jar.

Wipe the lip of the jars with a towel dipped in vinegar to keepany contamination from preventing a good seal.

Put the lids and rings on. Screw them on snugly, not too tight. 

Put the jars in the pressure canner.  Put the lid on and screw it down . . . thereshould be about 3 inches of boiling water in bottom of the canner . . . do notput the weight on yet

Let the canner vent steam for 10 minutes. Keep the waterboiling.

After venting, put the weight on (or close the valve) andlet it heat up and build pressure to the pressure for your type of pressurecanner.  Mine is 5 pounds.  Then process the jars for 15 minutes

Remember to adjust the time if you are at a differentaltitude other than sea level!

Lift the jars out of the water and let them cool withouttouching or bumping them in a draft-free place (usually takes overnight)  You can then remove the rings if you like.Once the jars are cool, you can check that they are sealed verifying that thelid has been sucked down. Just press in the center, gently, with your finger.If it pops up and down (often making a popping sound), it is not sealed. If youput the jar in the refrigerator right away, you can still use it.

Now, just store them in a cool, dark place and use them asneeded over the next year!

Rabu, 07 September 2011

Peter Piper Picked a Peck of Pickled Peppers


Peter Piper picked a peck of pickled peppers;
A peck of pickled peppers Peter Piper picked;
If Peter Piper picked a peck of pickled peppers,
Where's the peck of pickled peppers Peter Piper picked?

Who is Peter Piper? Why, he’s a fellow named Peter who blows a pipe and picks peppers . . .duh!

But more importantly, what in the heck is a peck??  A peck is a measurement unit of dry measure .. . it is equal to 2 gallons or 8 dry quarts or 16 dry pints. That’s a lot ofpeppers!  But it doesn’t turn out to be awhole peck  . . . er . . . heck of a lotwhen you pickle them.

If you’ve gotten a garden and your peppers are popping youshould want a way to preserve them. There are a number of different ways to do this.  Last year I dried most of my peppers withexcellent results . . . I’m still using them in any number of recipes callingfor pepper flakes. 

But, this year I decided to try something different . . .taking a cue from Peter Piper I opted to pickle and can them.

To Make Homemade Pickled Peppers you can use just about anykind of pepper . . . hot or sweet . . . including Chilies, Pimiento, Hungarian,Banana, Jalapeno, Etc.

If stored properly, canned pickled peppers have a shelf lifeof about 12 months.  That is they shouldbe kept in a cool, dark place

For 9 pints you will need about 7 lbs of peppers total.  You can mix and match varieties, hot andsweet . . . whatever you want.

You will also need:

Jar grabber (to pick up the hot jars)
Jar funnel
Large spoons and ladles
At least 1 large pot
One 6 - 8 quart pot or saucepan
Pint Sized Ball jars
1 Canner or a huge pot


It’s very important that you select peppers that are veryfresh and crisp.  Limp, old peppers willmake nasty tasting canned peppers. 

Hot pepper caution: Wear plastic or rubber gloves and do nottouch your face while handling or cutting hot peppers. If you do not weargloves, wash hands thoroughly with soap and water before touching your face oreyes . . . or your private parts. Ouchie!!


Wash the jars and lids. The dishwasher is fine for the jars. I put the lids in a small pot of almost boiling water for 5 minutes, anduse the magnetic "lid lifter wand to pull them out.

Get a large pot of water boiling.  This is for the hot water bath that you willbe processing the peppers in.

Wash the peppers to remove any dirt and debris.  You can remove the seeds if you want to, atthis point.  I like to keep my hot pepperswhole for the fullest heat. 


Blister the peppers by placing them in a hot oven set at 400ยบ for 6 to 8 minutes; using tongs carefully turnpepper often until skin blisters evenly on all sides.  Then place them in a bowl covered with a toweluntil you’re ready to use them.

Next you want to prepare your pickling solution.  In a saucepan, combine and heat:

5 cups vinegar (5%)
1 cup water
4 tsp canning or pickling salt
2 tbsp sugar
2 cloves garlic

Heat it to boiling and simmer for 10 minutes. Then removethe garlic (and discard).

Pack the jars with the pickles and pour the vinegar solutioninto each packed jar.  Fill jars, leaving1/2-inch of headspace. Flatten whole peppers. You may add 1/2 teaspoon of saltto each pint jar, if desired for taste (it is not a preservative).

Put the lids on each jar and seal them by putting a ring onand screwing it down snugly (but not with all your might, just"snug").

Put the jars in the canner and keep them covered with atleast 1 inch of water. Keep the water boiling. Boil them for 10 minutes.  Remember to adjust for altitudes . . .

The normal boilingpoint of water at sea level is 212°. At higher altitudes, water boils at lowertemperatures. When processing jars of jams, pickles, and other preserves in aboiling water bath at higher altitudes, use the following chart to adjust times.

1,001 feet to 3,000feet, add 5 minutes to processing times.
3,001 feet to 6,000 feet, add 10 minutes to processing times.
6,001 feet to 8,000 feet, add 15 minutes to processing times.
8,001 feet to 10,000 feet, add 20 minutes to processing times.


Lift the jars out of the water and let them cool on a woodencutting board or a towel, without touching or bumping them in a draft-freeplace (usually takes overnight), where they won't be bumped. You can thenremove the rings if you like. Once the jars are cool, you can check that theyare sealed verifying that the lid has been sucked down. Just press in thecenter, gently, with your finger. If it pops up and down (often making apopping sound), it is not sealed. If you put the jar in the refrigerator rightaway, you can still use it.


Kamis, 04 Agustus 2011

Doubtless God could have made a better berry (than the strawberry), but doubtless God never did


Picking strawberries for a local farmer was my first job ever.  We got paid by the pint . . . I don’t remember but the going rate was but what I do remember is that as a little kid it was nice to have some pocket money to buy a Nutty Buddy Ice Cream on a hot summer day. 


There is a legend that strawberries were named in the nineteenth-century by English children who picked the fruit, strung them on grass straws and sold them as "Straws of berries".   It’s unproven but makes an interesting story.

Strawberries are yum-dilly-icious . . . but they are technically not berries.  This is because they do not contain seeds on the inside but on the outside.  A strawberry can have up to 200 “seeds” on the outside . . . which are technically not seeds but are considered separate fruits unto themselves.  Who knew strawberries were so complex?

Did you know that lemons have more sugar than strawberries?  Unbelievable huh?  Well, it all depends on how you look at it.  On a per fruit basis, this is true . . . a large strawberry has 1.7 grams of sugar whereas an average lemon has 2 grams of sugar.  However, if you look at it by volume, strawberries clearly win out on the sweetness scale. 


A recent national survey concluded that people who do not eat strawberries are weird.  But those of us who enjoy them are considered “fun loving, intelligent and happy."


Strawberry Jam

2 Pounds Fresh Strawberries, Hulled
4 Cups White Sugar
1/4 Cup Lemon Juice


*Note:  2 pounds of strawberries makes 5 pints of jam.


In a wide bowl, crush strawberries in batches until you have 4 cups of mashed berry. I used my Kitchenaid mixer with the fruit and vegetable strainer attachment.  

In a heavy bottomed saucepan, mix together the strawberries, sugar, and lemon juice. Stir over low heat until the sugar is dissolved. Increase heat to high, and bring the mixture to a full rolling boil. Boil, stirring often, until the mixture reaches 220 degrees  . 

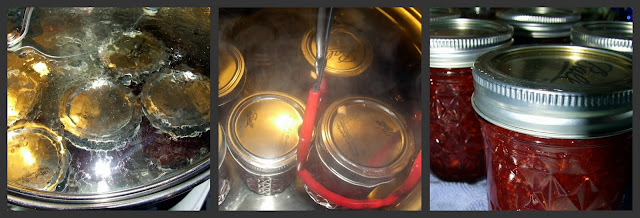
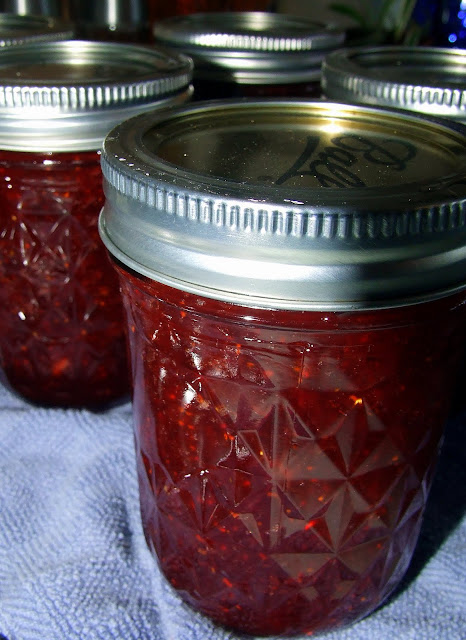
Transfer to hot sterile jars, leaving 1/4 to 1/2 inch headspace, and seal. Process for 10 minutes in a water bath. If the jam is going to be eaten right away, don't bother with processing, and just refrigerate.


To test for jelling
Place three plates in a freezer... after about 10 minutes of boiling place a tsp of the liquid of the jam onto the cold plate. Return to freezer for a minute. Run your finger through the jam on the plate... if it doesn't try to run back together (if you can make a line through it with your finger) it's ready to be canned!