Waste not, want not. Not a bad adage to live by . . . after all, if you don't waste things, you are less likely to end up lacking them.
One of the things we are easily able to save and reprocess into a useable product is soap scraps. We save the little bits of bar soap can’t really used for bathing and washing up. We keep a small cup in the bathroom and when a bar of soap has outlived its current usefulness we put the fragment in it. When the cup is full I can repurpose the bits into something more useful.
It’s really quite easy and takes almost no time at all.
I put the left-over soap pieces in a microwaveable bowl and melt them on a low setting . . . like the melt butter or soften ice cream setting.
It doesn't take long . . . less than a minute . . . for the soap to become softened and pliable. I don't melt it to a liquid state . . . just smooshy like soft cream cheese.
I take a nylon stocking . . . I keep a supply of ankle highs in the kitchen for a multitude of purposes . . . and wrap it around a jar so that the foot part is inside the jar.
Stir the softened soap and then scoop it into the well created by the stocking in the jar.
And, then lift the stocking out and twist it until the soap is in the shape of a ball. Then tie off the stocking.
This is great to hang by the garden hose or by a utility sink to wash up with. The nylon acts as a built in wash cloth and helps to remove dirt and debris from your skin.
You know why water doesn’t wash away dirt, right? Well, I’m going to assume you don’t and tell you anyway.
Water is H2O . . . which, in layman’s terms is, one little bit of oxygen and two tads of hydrogen. The two hydrogen tads like to hang out with the oxygen bit, the tads are on one side of the molecule and the bit is on the other. All kinds of chemical mumbo jumbo magical stuff happens which basically just makes water molecules stick together to make . . . well . . . a whole bunch of water.
Okay, so back to the original question. The bonded water bits and tads create a pull in every direction - except at the surface. Because the fellas on the surface have no other fellas above them to pull on them, so they are only pulled by the ones underneath them. This creates surface tension, like a skin . . . water skin as it were, but not a waterskin.
Water strider insects actually skim around on the skin-like surface of ponds and streams . . . they can actually walk on water. Not because they are godlike but because they have cool little pontooned feet.
Again, back to the original question . . . water can’t wash away dirt because it mixes in with the oil on your body, and water is simply not attracted to oily things . . . as you know, oil and water do not mix.
Soap changes everything. Soap molecules are shaped kind of like caterpillars. The head of the caterpillar likes to chill in the water and the tail end like to wallow in the oil. When you add soap to water, the soap molecules near the surface squeeze between the surface molecules of the water and all stand on their water-loving heads with their water-hating tails in the air, breaking up the surface tension.
Soap bubbles last longer than plain water bubbles because there is too much surface tension in water for it to remain in a bubble. In a soap bubble, the tails of the soap molecules are on the outside of the bubble, which also protects it from evaporation. If you want to see how long you can keep a soap bubble, try putting it in a jar. One bubble lover kept a bubble for 341 days this way.
So there you have it . . . the reason water alone does not do the job is that we are oily. What dirt attaches itself to us is embedded in this oil, and it repels water. Until we reach for that bar of soap.
Cranberry Apple Tea Soap
16 Ounces Lard
1 Ounce Honey Added At Trace
1 Tsp Cinnamon Added At Trace
2.3 Ounces Lye
7 Ounces Ice Cold Or Part Frozen Brewed Cranberry Apple Zinger Tea
Remember that when you’re making your own soap that you should have a dedicated set of equipment set aside just for this process.
This recipe is for a I’m going to be making cold process soap. The basic tools required are:
A Large Pot . . . Enamel or cast iron do very well for this.
A Large Wooden Or Plastic Spoon
A Hand Mixer (Optional)
A Large Baking Pan Or Shallow Cardboard Box
Put the ice cold tea into a 1 quart bowl. Using the stirring spoon (known to soap makers as the "crutch"), pour lye slowly into the tea, stirring until the lye is all dissolved. Remember that lye is very caustic and will burn your skin and eyes! Any splatters must be washed off immediately with lots of water!
Cranberry Apple Tea
After Lye is added
After Lye is dissolved
Cover the solution to keep out air and allow to cool (or warm up) to about 85 degrees F. No need to apply heat – heat will be chemically produced when the lye comes in contact with the liquid
Melt the fat in the 4-6 quart bowl or pot. Don't use aluminum or galvanized bowls! When the fat is melted, cool it down to 95 degrees F. Prepare the box with a plastic trash bag lining, so the fresh liquid soap can't leak out.
When all is ready, begin to stir the liquid fat in a clockwise direction while pouring the lye mixture into it in a thin steam (pencil size or thinner) until it is all added. Crutch (stir) the mix vigorously, using “S” pattern or use a hand blender alternating with a circular pattern until the mix begins to cool and thicken. At this point do NOT stop or the mix may separate!
First the soap will be murky, then creamy, then like heavy cream and finally, like hot cooked pudding and will show traces when you dribble a stream from the crutch onto the surface. This process can take from 10 minutes to 45 minutes, depending on the temperature, weather and purity of your ingredients. Stir vigorously but patiently! With hand blender stir time is cut to 1/10 of the regular time.
I've found that using my old Kitchen-aid Classic is the perfect tool for stirring my batches of soap. Although i am constantly monitoring the mixing process, the stand mixer lets me be a little more hands off and I can be doing other things around the kitchen while the soap is mixing and cooling.
When your "trace" does not sink back into the surface, the soap is ready to pour into the lined box. Wear rubber gloves and treat the raw soap like you treated the lye water. Wash off all splatters immediately. Have 10% vinegar and water and a sponge to neutralize splatters.
After 3-5 hours the soap may be cut into bars with a table knife, NOT a sharp knife. Allow the soap to cure in the box for about a week before breaking it up and handling it, and another month before using it.
In a week remove the soap and break apart. Let them cure for at least a month before using.
If you are interested in some perfectly wonderful hand crafted soap but don't want to go through the process of making it . . . Soaps by Judy is a fantastic source. She's a personal friend of mine and a great lady and she makes the most amazing soaps! Check out her website and look her up on Facebook.
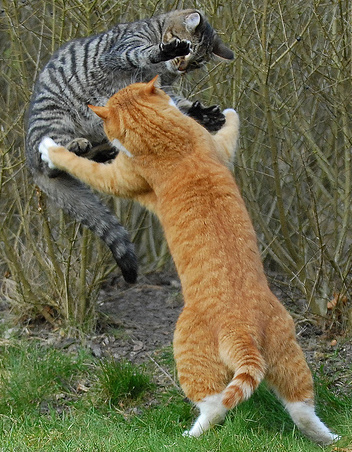
Fighting tooth and nail is a simile to the way animals fight to survive, teeth and claws(nails) being the only weapons they are endowed with. It is to struggle with all one’s strengths and resources in order to win when something important is at stake.
In effect when people say - he fought tooth and nail for his rights - they're saying that he fought fiercely with all he had for his rights.
Do you know it is not the police’s responsibility to defend individuals? It is their job to protect the public and enforce the laws. I hear reports on the news all the time of people who were injured or killed because they didn’t have the means to protect themselves.
Being a 4’13” woman, I believe it is my right and responsibility to have the knowledge and means to defend myself, my home and my family . . . by tooth and nail if necessary.
I have with me, at all times, different means of self defense. Not the least of which is a weapon at all . . . it’s a state of mind. Situational awareness . . . this is simply being observant of my surroundings and being able to identify potentially dangerous situations. By being conscious of what is going on around me I am able to avoid unsafe conditions or be prepared to defend myself.
I have taken courses on hand-to-hand personal defense that have provided me with useful techniques to use to protect myself. I’m not talking about a martial arts class, but basic training in methods to fend off and inflict injury in order to escape. For example . . . in the instance of a male attacker, I solid kick to the groin area combined with knee to the face is extremely effective in disabling an attacker. Obviously, there are different techniques for different situations.
I also have a permit to carry a pistol and I am a certified pistol instructor. As such, I am a practiced shooter and very comfortable in the use of firearm. I carry a pistol with me everywhere I go that it is legal and permissible to do so. This is a last resort of self defense . . . only point a gun at something or someone you intend to destroy . . . guns are serious business.
Having the knowledge and skill to be able to protect myself gives me a sense of empowerment like nothing else has.
I would recommend some form of personal defense for anybody. However, not every form of self protection is for everybody. A person should use whatever they are comfortable with . . . it doesn’t make any sense for someone who is afraid of guns to carry one . . . . what good will it do if you’re frightened to employ it?
________________________________________
That being said . . . honey badger don’t care . . . honey badger is a bad ass!
________________________________________
Cinnamon Hazelnut Coffee Soap
16 ounces lard
1/2 teaspoon Instant Coffee, added at trace
1/84 cup honey added at trace
2.3 ounces lye
7 ounces Ice Cold or Part Frozen Strong Black Coffee
Remember that when you’re making your own soap that you should have a dedicated set of equipment set aside just for this process.
This recipe is for a cold process soap. The basic tools required are:
A Large Pot . . . Enamel or cast iron do very well for this.
A Large Wooden or Plastic Spoon
A Hand Mixer (Optional)
A Large Baking Pan or Shallow Cardboard Box
Put the ice cold coffee 1 to 2 quart container. I use a dedicate 1-quart plastic measuring cup.
Using the stirring spoon (known to soap makers as the "crutch"), pour lye slowly into the coffee, stirring until the lye is all dissolved. Remember that lye is very caustic and will burn your skin and eyes! Any splatters must be washed off immediately with lots of water!
Cover the solution to keep out air and allow to cool (or warm up) to about 85 degrees F. No need to apply heat – heat will be chemically produced when the lye comes in contact with the liquid.
Melt the fat in the 4-6 quart bowl or pot. Don't use aluminum or galvanized bowls! When the fat is melted, cool it down to 95 degrees F. Prepare the box with a plastic trash bag lining, so the fresh liquid soap can't leak out. Note that I am using a shotgun shell four-pack box. This is the perfect size for this recipe to create a nice thickness for the soap.
When all is ready, begin to stir the liquid fat in a circular direction while pouring the lye water into it in a thin steam (pencil size or thinner) until it is all added. Crutch (stir) the mix vigorously, using “S” pattern or use a hand blender alternating with a circular pattern until the mix begins to cool and thicken. At this point do NOT stop or the mix may separate!
First the soap will be murky, then creamy, then like heavy cream and finally, like hot cooked pudding and will show traces when you dribble a stream from the crutch onto the surface. This process can take from 10 minutes to 45 minutes, depending on the temperature, weather and purity of your ingredients. Stir vigorously but patiently! With hand blender stir time is cut to 1/10 of the regular time.
I've found that using my old Kitchen-aid Classic is the perfect tool for stirring my batches of soap. Although I am constantly monitoring the mixing process, the stand mixer lets me be a little more hands off and I can be doing other things around the kitchen while the soap is mixing and cooling.
Add the honey and instant coffee at trace. Trace is when the mixture doesn't sink back into itself. It will look like caramel.
When your "trace" does not sink back into the surface, the soap is ready to pour into the lined box. Wear rubber gloves and treat the raw soap like you treated the lye water. Wash off all splatters immediately. Have 10% vinegar and water and a sponge to neutralize splatters.
Once the soap is in the box, sprinkle with cinnamon. This will add a pleasant scent and also act as an exfoliant. It also looks really pretty on the finished bars.
After 3-5 hours the soap may be cut into bars with a table knife, NOT a sharp knife. Allow the soap to cure in the box for about a week before breaking it up and handling it, and another month before using it.
If you are interested in some perfectly wonderful hand crafted soap but don't want to go through the process of making it . . . Soaps by Judy is a fantastic source. She's a personal friend of mine and a great lady and she makes the most amazing soaps! Check out her website and look her up on Facebook.